Sunday, April 26, 2015

Illustration: Beauty

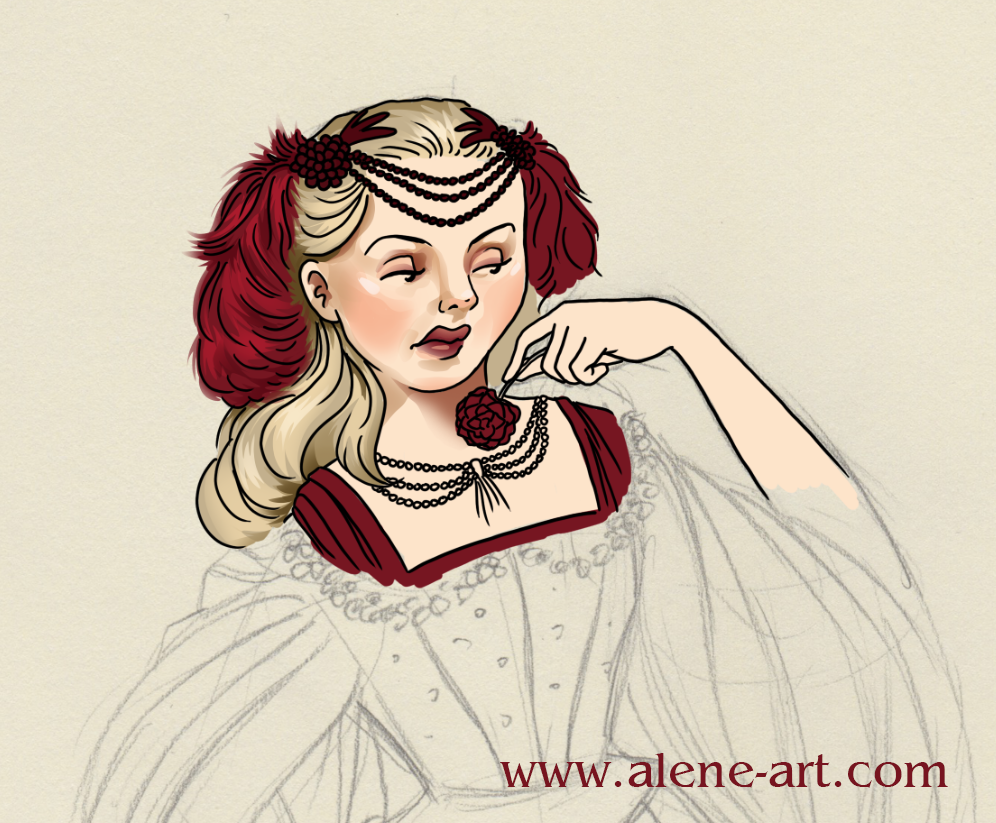
I've been very busy, but I couldn't pass up the gorgeous Alizarin Crimson that was this week's Colour Collective theme, so I snatched a few hours to do a little picture. I didn't want to do anything complicated, as I was essentially using this as R and R, so I chose to do a little picture of Belle in Jean Cocteau's La Belle et la BĂȘte (1946), which is one of the most gorgeous films ever.


Here's a look at the scene this dress appears in:

Picture from MoMA
The film is black and white, so that leaves colours open to interpretation. I thought this dress would be particularly nice in a deep crimson, rather than the black it appears as on screen. 

I did a quick sketch for this little picture while sitting on the couch, and then moved to the computer.


When it came to filling in the skirt, I chose to make it very solid – most of the costumes in this film are very stiff and formal, the fabric doesn't flow and drape much and the actors move very slowly and deliberately, and I thought my roughly-sketched lines looked a little too floaty. 

I didn't manage to finish it in time for the Colour Collective deadline, so I had to post a wip. I finished it off the next evening:


Adobe Photoshop CC with a Wacom Intuos 5. 
To colour I used the lasso tool and a big soft-edged brush – rather like gradient shapes in Illustrator, but quicker, as I don't have to fiddle with gradient settings all the time. 

Watercolour: Fairy

When the Colour Collective theme turned up as Cobalt Turquoise Light, I knew I had to do a watercolour for it, as that is a colour I have had in my watercolour box for years, and although it's not my most neglected colour, it doesn't get enough love. 

I thought it was a good colour for a fairy, so I grabbed one from a recent sketchbook page, transferred it to watercolour paper, inked and painted it:


Here's the original sketch:


Winsor & Newton watercolours in a Moleskine Watercolour Sketchbook
I took a couple of progress shots and posted them to my Instagram account while I was working.

Easter Dragon

This is the Colour Collective picture I did three weeks ago, for the Emerald Green challenge (and then promptly forgot to blog about). Since it was Easter at the time, I decided to give this picture a bit of an Easter vibe – but I also wanted to do an emerald green dragon, so I compromised:


This is Adobe Photoshop CC over a pencil sketch, with some Japanese paper textures behind. I didn't have very long to spend on it, so I didn't attempt anything too elaborate. 

Saturday, April 11, 2015

Watercolour: King Arthur

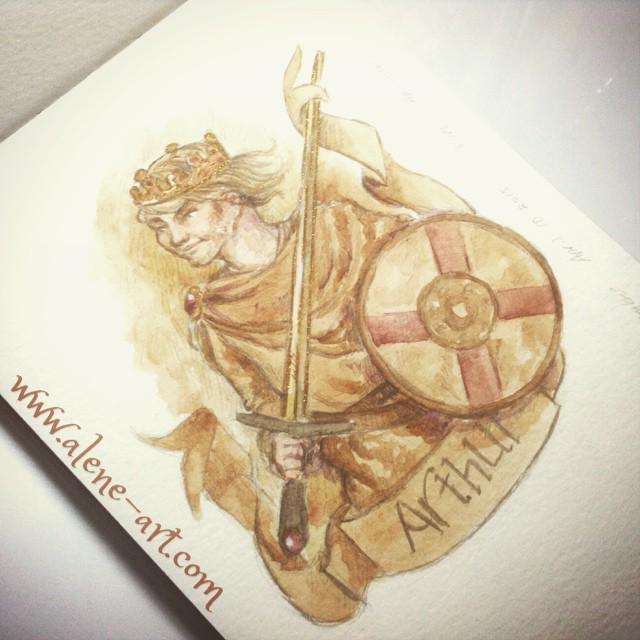
I was watching a documentary on King Arthur, so when it came time to whip up a quick picture for Colour Collective on twitter, I went with him as my theme. The colour this week was Burnt Umber, which I thought worked quite well for a dark ages watercolour sketch. 

According to the documentary, King Arthur was probably Romano-British, not Saxon... but I hadn't got that far into the documentary when I did the sketch, so this is a Saxon King Arthur. ^.~


This is almost entirely done in burnt umber. I used a bit of burnt sienna, rose dorĂ© and permanent mauve in the skin, and added some shadows in sienna and vandyke brown, with the accents in raw umber and indian red. But most of what you can see is definitely burnt umber. 

Here is my original sketch. My pencil lines got a bit obliterated, I probably should have used a harder lead... I don't often do watercolour over pencil, I think I need to experiment a bit more. 


And I added a little metallic gold to it after I had scanned it:


Winsor & Newton watercolours in a Moleskine watercolour sketchbook.
Somewhere between one and two hours.

Thursday, April 9, 2015

Tutorial: Needle Felted Star

I thought it was about time I posted another tutorial for something, so I took a few snaps while I was felting a very simple star this evening. They're not the prettiest, I was felting while watching tv, and as it wasn't very precise work I didn't have an extra lamp, and I couldn't be bothered getting up to get my camera, so used my iPad to take the photos. I think they serve their purpose though. =)

This tutorial is for a small star, like these ones, which I am using for a baby mobile I am putting together for one of this year's many babies. 


Needle Felted Star

Materials: 
  • Dacron Stuffing (any that hasn't been treated for anti-clumping)
  • Wool Roving (I am using merino)
  • Felting Needles (Just one will do, but I am using three, a coarse 32, a medium 36 & a fine 40)


Time:
  • Between 30 and 45 minutes


Step One

Grab a loose handful of dacron stuffing (any that isn't treated for anti clumping) and start felting it into a rough flattish circle using a coarse needle (this is a number 32). Stab the dacron all over, turning the ball as you go, to ensure even stabbage. This ball in the photograph has already reduced in size by roughly half.


You want to eventually get the ball down to the diameter that you want for the outer points of your star. This ball is not quite spherical: the sides are flattened somewhat, so it's between a disc and a sphere. We'll call it a bloated disc.


Step Two

Now that you have a rough base to work with, start defining the points of your star by stabbing repeatedly into small areas on the edges of your bloated disc, so that the felt compacts further and you end up with a flower shape. I am still using a number 32 needle here. Make sure you felt into a small area, so that the compacting is clearly defined.  


Step Three

Now turn your attention to the sides of the points of your star. Stab your needle into the rounded sides of the petals of the above flower shape, until your points are at your desired level of pointyness. In this instance, I wanted them fairly rounded, because this is for a baby mobile, and cute is good there!

At this point I alternated between the #32 and a #36 needle (which is a bit finer) but I wasn't too concerned with being really neat and precise, because the next step involves obliterating this shape somewhat.


Step Four

Choose some wool roving to cover your dacron star. I chose yellow, because I'm being semi-realistic here. Wrap it right around the star shape, and stab it in a few places to prevent it from unravelling on you. The points are tricky to cover, but you can always add more roving there later, so don't worry when they keep insisting on remaining bald. Then everything is felted down a bit more, just grab some extra roving and felt it into the corners. 

I started felting the roving onto the star with a #36 needle. At this point the #32 is a bit coarse for the job, as the dacron is tightly packed and prefers finer needles. 


Step Five

When I had the roving generally felted down, I switched to a #40 Spiral needle (it could just as easily have been a #40 plain triangular needle, but that snapped a couple of nights ago and I am yet to dig out another one) so that I could get the finer detail and smoother surface that a really fine needle allows. 

Et voila:


LinkWithin

Related Posts Plugin for WordPress, Blogger...